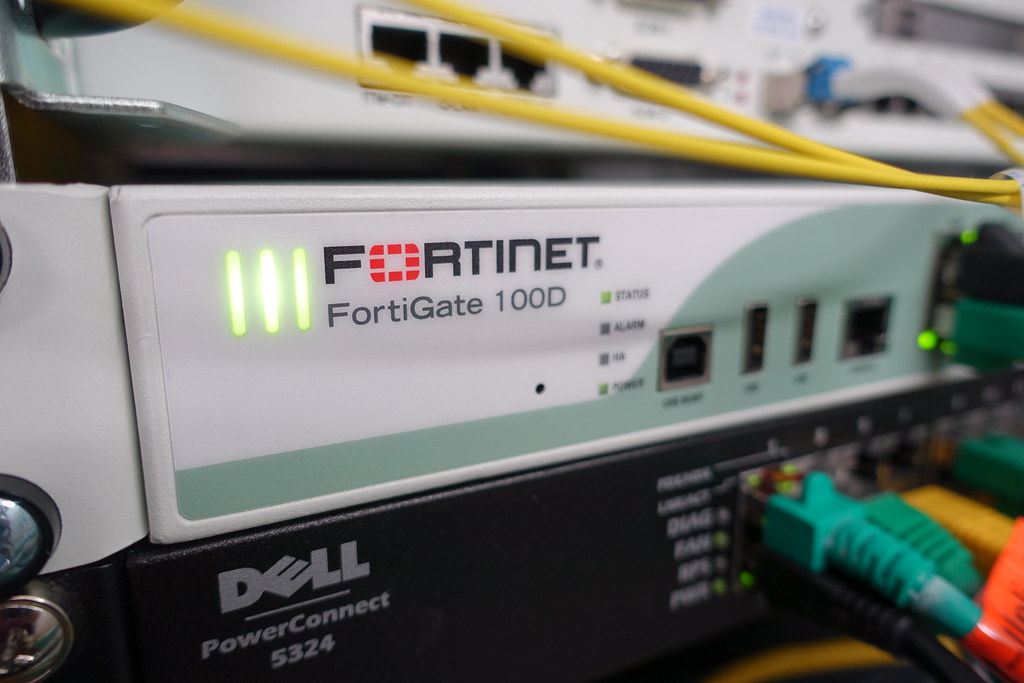
In today’s fast-paced digital landscape, businesses are increasingly reliant on their Wide Area Networks (WANs) to connect distributed workforces, facilitate cloud application access, and support dynamic operational needs. However, traditional WAN architectures often struggle to keep pace, presenting challenges in terms of complexity, escalating costs, and critical security gaps. This is where FortiGate SD-WAN emerges as a powerful solution, offering a modern, agile, and secure approach to network connectivity.
While the benefits of FortiGate SD-WAN are clear, the complexities of deployment, configuration, and ongoing management can be a significant hurdle for many organizations. This article explores how embracing a managed FortiGate SD-WAN service can dramatically simplify your WAN transformation journey, unlocking the full spectrum of Fortinet SD-WAN benefits and ensuring robust, secure SD-WAN solutions for your business.
The Evolution of WAN and the SD-WAN Imperative
For decades, Multi-Protocol Label Switching (MPLS) was the gold standard for enterprise WANs, offering reliability and predictability. However, the rise of cloud computing, SaaS applications, and a globally distributed workforce has exposed the limitations of this traditional model:
Backhauling Traffic: Routing all internet-bound traffic back through a central data center for security inspection (known as “backhauling”) introduces latency and bottlenecks, especially for cloud applications.
High Costs: MPLS circuits can be expensive, and scaling bandwidth often incurs significant additional costs.
Lack of Agility: Traditional WANs are rigid and slow to adapt to new business requirements or unexpected changes in network traffic patterns.
Limited Visibility & Control: Gaining granular insight into application performance and traffic routing across diverse links is challenging.
Software-Defined Wide Area Networking (SD-WAN) addresses these challenges by abstracting network control from hardware, allowing for intelligent traffic management, application-aware routing, and the ability to leverage multiple transport types (broadband, MPLS, LTE/5G).
FortiGate SD-WAN: A Secure Foundation for Modern Networks
Fortinet stands out in the SD-WAN landscape with its security-driven networking approach. At its core, FortiGate SD-WAN consolidates networking and industry-leading security functions into a single, integrated appliance. This convergence means:
Built-in Next-Generation Firewall (NGFW): FortiGate appliances include advanced security features like intrusion prevention, web filtering, anti-malware, and deep packet inspection, providing a comprehensive defense against cyber threats at every edge.
Advanced Application Awareness: FortiGate can identify thousands of applications on the first packet, enabling intelligent routing decisions based on application performance requirements and business criticality.
WAN Optimization & Remediation: Features like data deduplication, compression, and forward error correction improve application performance and mitigate the impact of network issues.
Centralized Management: FortiManager provides a single pane of glass for orchestrating, configuring, and monitoring the entire SD-WAN fabric, simplifying policy enforcement and deployment.
By integrating security directly into the SD-WAN fabric, FortiGate ensures that your network remains protected without compromising performance, a crucial distinction in the modern threat landscape.
Why a Managed FortiGate SD-WAN Service? The Simplification Factor
While FortiGate SD-WAN offers significant capabilities, its full potential is best realized with expert management. Implementing and maintaining a complex SD-WAN environment requires specialized skills, significant time investment, and continuous vigilance. This is where a managed FortiGate SD-WAN service becomes invaluable.
A managed service provider (MSP) takes on the burden of:
Design and Planning: Tailoring the SD-WAN solution to your specific business needs, network topology, and security requirements.
Deployment and Provisioning: Handling the installation, configuration, and zero-touch provisioning of FortiGate appliances across all your sites.
24/7 Monitoring and Support: Proactively monitoring network health, identifying and resolving issues, and providing continuous support to ensure optimal performance and uptime.
Security Policy Management: Regularly updating security policies, threat intelligence, and patches to protect against evolving cyber threats.
Performance Optimization: Continuously tuning routing policies and WAN optimization features to ensure critical applications always have the best path.
Reporting and Analytics: Providing comprehensive insights into network performance, security events, and application usage.
By offloading these responsibilities to experts, your organization can significantly accelerate its WAN transformation without straining internal IT resources.
Key Benefits of Managed FortiGate SD-WAN
Partnering with a managed service provider for your FortiGate SD-WAN deployment delivers a multitude of Fortinet SD-WAN benefits:
Enhanced Security Posture: A managed service ensures that FortiGate’s robust NGFW capabilities are always optimized and up-to-date. This includes proactive threat intelligence updates, consistent security policy enforcement across all branches, and expert incident response. You gain the peace of mind that your network is protected by comprehensive, secure SD-WAN solutions against sophisticated cyber threats.
Optimized Application Performance & User Experience: Expert-managed FortiGate SD-WAN intelligently prioritizes business-critical applications (e.g., VoIP, video conferencing, SaaS applications) and dynamically selects the best available path. This eliminates latency and packet loss, resulting in a superior and consistent user experience, boosting productivity across your entire organization.
Operational Efficiency & Reduced Complexity: The core promise of a managed service is simplification. Your IT teams are freed from the day-to-day complexities of managing the WAN infrastructure, allowing them to focus on higher-value strategic initiatives that drive business innovation. Centralized management handled by experts streamlines operations and minimizes human error.
Significant Cost Savings (Total Cost of Ownership): A managed FortiGate SD-WAN solution can lead to substantial cost reductions. By leveraging less expensive broadband links alongside or in place of costly MPLS, and optimizing bandwidth utilization, operational expenditures are significantly lowered. Furthermore, reducing the need for extensive in-house expertise and infrastructure management contributes to a lower total cost of ownership (TCO).
Scalability, Agility, and Future-Proofing: As your business grows or adapts to new markets, a managed FortiGate SD-WAN solution can easily scale to accommodate new sites, users, and applications. The agility of SD-WAN, combined with expert management, ensures your network remains flexible and ready for future technological advancements, including seamless integration with SASE (Secure Access Service Edge) frameworks.
What to Look for in a Managed Service Provider
When considering a managed FortiGate SD-WAN service, look for a provider with:
Proven expertise in Fortinet technologies.
A strong track record in delivering managed network and security services.
24/7 monitoring and support capabilities.
A clear understanding of your business needs and industry-specific requirements.
Transparent reporting and clear communication.
Conclusion
The transformation of your Wide Area Network is no longer an option but a necessity for modern businesses. While FortiGate SD-WAN offers a powerful and secure foundation for this transformation, the journey can be complex. By choosing a managed FortiGate SD-WAN service, you gain access to expert knowledge, continuous support, and proactive security, all while benefiting from optimized performance and reduced costs. Simplify your WAN transformation and empower your business with robust, secure SD-WAN solutions that truly deliver.
Your FortiGate firewall is a powerful shield for your network, a cornerstone of your cybersecurity defense. But are you certain it’s configured for maximum protection? In the face of increasingly sophisticated cyber threats, a default or “set-it-and-forget-it” approach to firewall management is a significant risk. The complexity of an optimal setup requires deep expertise and continuous attention.
This is where managed firewall services become a game-changer. It provides the expert oversight needed to transform your firewall from a simple barrier into an intelligent, proactive defense system. For businesses without a large, dedicated security team, its the most effective way to ensure robust protection.
This article explores the top five critical FortiGate configurations that are best entrusted to a certified managed service provider (MSP), ensuring your network is not just protected, but truly secure.
First, What is a FortiGate Managed Service? (And Why It Matters)
A FortiGate managed service is an offering where a third-party team of certified cybersecurity experts takes responsibility for the 24/7 monitoring, management, and maintenance of your FortiGate firewalls. Think of it as having a team of elite Fortinet specialists guarding your digital front door around the clock.
The core benefits extend beyond simple device management:
Proactive Threat Hunting: Continuous monitoring for suspicious activity.
Expert Configuration: Implementation of security best practices.
Regular Maintenance: Crucial firmware updates and performance tuning.
Peace of Mind: Knowing your network is protected by industry professionals.
By leveraging an MSP, you gain access to a level of expertise that is difficult and expensive to maintain in-house, allowing you to focus on your core business operations.
The Top 5 Critical FortiGate Configurations for Your Business Security
A managed service doesn’t just watch over your firewall; they unlock its most powerful features. Here are five key configurations they expertly handle to fortify your defenses.
1. Advanced Firewall Policies and Rule Optimization
A firewall’s strength lies in its rules. A poorly configured rule set can leave gaping holes in your defense. A managed service moves beyond basic “allow” and “deny” rules to implement a strategy of least privilege access.
What it is: This involves a meticulous review of all firewall policies to ensure that users, devices, and applications only have the absolute minimum level of access required to perform their functions. It includes optimizing rule order for performance and properly configuring Network Address Translation (NAT).
Why it’s critical: A cluttered or overly permissive rule set is a common vector for attack. An attacker who compromises a low-level user account could gain broad access to sensitive parts of the network if policies are not restrictive.
The MSP Value: Certified engineers continuously audit and refine firewall rules. They remove outdated or redundant policies, ensure new rules are implemented securely, and document everything, which is crucial for performance, security, and compliance audits.
Modern FortiGate firewalls are equipped with a powerful suite of security features known as Unified Threat Management (UTM). Simply turning them on is not enough; they must be precisely tuned.
What it is: This is the fine-tuning of the integrated security profiles that make up Fortinets Security Fabric. This includes:
Antivirus: Configuring real-time scanning of traffic entering the network.
Web Filtering: Blocking access to malicious websites, phishing links, and enforcing company acceptable-use policies.
Intrusion Prevention System (IPS): Proactively identifying and blocking known cyberattack patterns and exploits before they can do damage.
Application Control: Granularly managing which applications (like Dropbox, Teams, or social media) are allowed to run on the network and by whom.
Why it’s critical: UTM features are your primary defense against malware, ransomware, and other advanced threats. If they are not properly configured, malicious files can slip through, and productivity can be impacted.
The MSP Value: A managed service has the expertise to configure these profiles without disrupting legitimate business traffic. They ensure signatures and threat intelligence are constantly updated, applying new protections as soon as they become available to defend against zero-day threats.
3. Secure VPN Access (SSL-VPN and IPsec)
In an era of hybrid work, providing secure remote access is non-negotiable. A misconfigured VPN is like leaving a back door unlocked.
What it is: This involves the proper setup and hardening of both SSL-VPNs, which allow individual remote employees to connect securely, and IPsec VPNs, which create secure tunnels between office locations.
Why it’s critical: VPNs extend your secure network perimeter to wherever your employees are. A weak configuration can expose your entire internal network to threats if a remote user’s device is compromised.
The MSP Value: An MSP will implement robust security on your VPNs, enforcing strong encryption standards, implementing multi-factor authentication (MFA) for access, and configuring split-tunneling policies correctly to ensure that all business traffic is inspected, no matter where the user is.
4. Robust User Authentication and Identity Management
Knowing who is on your network is as important as keeping threats out. Strong authentication ensures that only authorized individuals can access your data and systems.
What it is: This configuration focuses on integrating the FortiGate firewall with your company’s directory services, such as Microsoft Active Directory or Azure AD. It involves setting up Single Sign-On (SSO) and, most importantly, enforcing Multi-Factor Authentication (MFA).
Why it’s critical: Stolen credentials are one of the most common ways attackers breach a network. MFA is the single most effective defense against this, adding a crucial layer of security that prevents unauthorized access even if a password is compromised.
The MSP Value: A managed service handles the complex integration between your FortiGate and identity providers. They can roll out and manage MFA across your user base for firewall and VPN access, ensuring a seamless yet highly secure user experience and providing detailed logs of who is accessing what and when.
5. Proactive Monitoring, Logging, and Firmware Management
The cybersecurity landscape is never static. A firewall requires constant vigilance and maintenance to remain effective.
What it is: This is the ongoing, day-to-day work of security. It involves centralizing firewall logs for analysis (often with a tool like FortiAnalyzer), setting up alerts for suspicious events, and methodically testing and applying critical firmware updates released by Fortinet.
Why it’s critical: Without comprehensive logging, you have no way of knowing if your firewall is under attack or has been breached. Firmware updates often contain patches for critical vulnerabilities that attackers are actively exploiting. Falling behind on updates is one of the biggest and most common security risks.
The MSP Value: This is where an MSP truly shines. Their 24/7 Security Operations Center (SOC) provides the constant monitoring and expert analysis that is impossible for most businesses to replicate. They manage the entire lifecycle of firmware updatesfrom vetting and testing to scheduled deploymentensuring your defenses are always up-to-date without causing business disruption.
Partner with Experts to Maximize Your Security
Your FortiGate firewall is a critical investment in your company’s security. By entrusting its configuration and management to a specialized managed service provider, you ensure that investment yields the highest possible return. You gain not only a hardened security posture but also the freedom to focus on what you do bestrunning your business.
Is your FortiGate firewall configured for complete protection?
Contact us today for a complimentary security assessment. Our certified Fortinet experts will help you understand your current security posture and identify opportunities to strengthen your defenses.
Deploying a FortiGate firewall VM comes down to five steps: download and verify the correct FortiGate-VM image for your platform, import or launch it, run the first-time console setup to bring up the management interface, apply your license, then build out your interfaces and firewall policies. The exact clicks vary by hypervisor or cloud, but the sequence is the same everywhere. This guide walks through each step for VMware vSphere, Microsoft Hyper-V, KVM, and the major public clouds, using current FortiOS releases.
FortiGate-VM
FortiGate-VM is the virtual-machine edition of Fortinet’s FortiGate next-generation firewall. It runs the same FortiOS as the hardware appliances, so you get firewall policies, IPS, antivirus, web filtering, and VPN inside a virtualized data center or public cloud instead of on a physical box. Licensing is decoupled from the image: you deploy the image, then activate features and performance tiers with a license.
The image is free to download but does nothing useful until licensed. Decide your license model (BYOL, PAYG, or FortiFlex) and your FortiOS branch before you deploy, because on public cloud the license type is fixed for the life of the instance. As a Fortinet Advanced Partner since 2003, we deploy and manage FortiGate firewalls for mid-market clients across the GTA every week; the notes below reflect what actually trips people up.
Which FortiOS version should you deploy in 2026?
For production, deploy on FortiOS 7.4 or 7.6. These are the mature, widely deployed branches; 7.6.7 is the newest 7.6 patch, and many teams standardize on a slightly earlier, well-soaked release such as 7.6.6. FortiOS 8.0 was announced at Accelerate 2026 as the newest feature release, but it is not yet a production recommendation, so keep it in the lab for now.
If you are still on FortiOS 7.2.x, plan your upgrade now: 7.2 reaches end-of-support in September 2026, after which it stops receiving fixes and vulnerability patches. Choosing the right branch at deploy time avoids a forced migration a few months later.
Sept 2026
FortiOS 7.2.x reaches end-of-support; move new and existing FortiGate-VMs to 7.4 or 7.6 before then (Fortinet EOS notice).
Warning:
Fortinet is removing SSL VPN tunnel mode from FortiOS on the 7.6+ and 8.0 branches. Do not build a new remote-access design around SSL VPN. Use IPsec VPN for tunnel-based remote access and site-to-site connections, and ZTNA for per-application access. If you are migrating an older FortiGate, budget time to convert existing SSL VPN users to IPsec.
What do you need before deploying a FortiGate VM?
Before you start the deployment, make sure you have the following:
FortiGate VM License:
You need the correct license file (.lic), activation code, or FortiFlex token for your FortiGate VM. This determines the features, performance (how much traffic it can handle), and support you get.
Licenses are typically BYOL (Bring Your Own License), meaning you buy the license separately, or PAYG / on-demand (Pay-As-You-Go), found in cloud marketplaces where the software cost is part of the hourly or monthly fee. FortiFlex is a points-based usage model for organizations running many VMs. See the comparison below.
Virtualization Platform or Cloud Account:
You need access to a supported virtualization platform (like VMware vSphere, Microsoft Hyper-V, KVM) or a public cloud account (like AWS, Azure, GCP).
Ensure you have administrative access to create VMs, set up networks, and manage storage.
FortiGate VM Image:
Download the correct FortiGate VM image file for your platform from the Fortinet Support portal.
Common image formats include:
VMware:.ova (a single file for easy deployment) or .ovf/.vmdk.
Microsoft Hyper-V:.vhd or .vhdx.
KVM:.qcow2.
Public Clouds: Images are usually available directly in their marketplaces.
Important: After downloading, verify the file’s integrity using a checksum (SHA256 is preferred; MD5 is also published). Compare the checksum you calculate with the one provided on the Fortinet Support portal.
System Resources:
Ensure your virtualization environment or cloud account has enough CPU, RAM, storage, and network interfaces for the VM. Refer to the FortiGate VM datasheet for minimum and recommended specifications.
CPU: At least 1 virtual CPU, but 2 or more are recommended for better performance.
RAM: At least 2GB, but 4GB or more is often recommended, especially if you plan to use many security features.
Storage: A system disk is included with the image. You might need additional virtual disks for logging.
Network Interfaces: FortiGate VMs need multiple virtual network interfaces (vNICs) to connect to different parts of your network (e.g., management, internal network, external internet connection).
Network Configuration Plan:
Before you start, plan your network setup carefully.
Decide on IP addresses, subnet masks, default gateways, and DNS servers for each FortiGate interface (e.g., management, internal, external).
Consider if you’ll use VLANs (Virtual Local Area Networks) or advanced features like Link Aggregation (LAG) for network redundancy or increased speed.
Plan your security zones (e.g., internal, external, DMZ) which will help organize your firewall rules.
BYOL vs PAYG vs FortiFlex: which license do you pick?
On public cloud the license type is fixed for the life of the instance, so choose deliberately. BYOL suits predictable, long-running deployments and unlocks the full feature set and virtual domains; PAYG is fastest to stand up and best for short-lived or bursty workloads; FortiFlex fits organizations juggling many VMs that want pooled, usage-based consumption.
License model
How you pay
Best for
Notes
BYOL
Buy the license up front, apply the .lic file or token
Predictable, long-running VMs on any platform
Full feature set and VDOM support; portable across environments
PAYG / on-demand
Hourly or monthly via the cloud marketplace
Short-lived, test, or bursty cloud workloads
Packaged as unified threat management; no VDOMs; type is fixed for the instance’s life
FortiFlex
Points-based, consumption metered daily
Enterprises and MSSPs running many VMs
Apply a FortiFlex token; supports vCPU hot-add up to the entitlement
How do you deploy the FortiGate VM image, step by step?
The deployment process generally involves importing the VM image into your virtualization environment or launching it in the cloud, followed by initial setup. The five steps below take you from download to a licensed, policy-enforcing firewall.
Step 1: Download and Verify the FortiGate VM Image
Choose a supported FortiOS version (7.4 or 7.6) and the correct image for your platform (e.g., FGT_VM64 for VMware, FGT_VM64_HV for Hyper-V, FGT_VM64_KVM for KVM, or the relevant cloud image).
Download the VM image file.
Verify the Download: To ensure the file isn’t corrupted, calculate its checksum.# Example for Linux/macOS md5sum /path/to/your/fortigate_vm.ova sha256sum /path/to/your/fortigate_vm.ova Compare the result with the checksum listed on the Fortinet Support portal. If they don’t match, download the file again.
Step 2: Deploy the VM Image on Your Platform
The way you deploy the image changes depending on your virtualization or cloud platform.
For VMware vSphere (using OVA)
An OVA file is a bundled package that makes deployment easy.
In the vSphere Client, right-click your Datacenter or Cluster and select ‘Deploy OVF Template…’.
Choose ‘Local file’ and browse to your downloaded .ova file. Click ‘Next’.
Give your virtual machine a name and choose where to store it. Click ‘Next’.
Select the host or cluster where the VM will run. Click ‘Next’.
Review the template details. Click ‘Next’.
Configuration: If the OVA offers different VM sizes (e.g., different CPU/RAM), choose the one that matches your license and resource plan. Click ‘Next’.
Storage: Select the datastore for the VM files.
Disk Provisioning: ‘Thin Provision’ is recommended to save disk space, as the disk grows only as data is written.
Click ‘Next’.
Network Mapping: This is crucial. Map the networks in the OVA template (like Network 1, Network 2) to your actual network port groups in vSphere (e.g., VM Network, Internal_VLAN10). Ensure that Network 1 from the OVA maps to the network you want to use for the FortiGate’s port1 (the default management interface). Click ‘Next’.
Review all settings and click ‘Finish’ to start the deployment.
Interface order equals port order. Whatever hypervisor or cloud you use, the first vNIC becomes port1, the second becomes port2, and so on. Map your management network to the first interface, and add the rest in the order you want them numbered. Getting this wrong is the most common reason a fresh FortiGate-VM is unreachable after boot.
For Microsoft Hyper-V (using VHD/VHDX)
You’ll create a new VM and attach the downloaded virtual hard disk.
Open Hyper-V Manager.
In the Actions pane, select ‘New’ > ‘Virtual Machine…’. Click ‘Next’.
Give the VM a name. Click ‘Next’.
Specify Generation: FortiGate VMs typically support ‘Generation 1’. Check Fortinet’s documentation for your specific VM version if you’re unsure. Click ‘Next’.
Assign Memory: Set the amount of RAM for the VM. Click ‘Next’.
Configure Networking: Connect the first network adapter (which will be FortiGate’s port1) to a virtual switch that allows access to your management network. You can add more network adapters later. Click ‘Next’.
Connect Virtual Hard Disk: Select ‘Use an existing virtual hard disk’ and browse to your downloaded .vhd or .vhdx file. Click ‘Next’.
Review the summary and click ‘Finish’.
After the VM is created, you might need to go into its settings in Hyper-V Manager to add more network adapters and connect them to your internal or external virtual switches. The order in which you add these adapters will typically determine which FortiGate port they map to (e.g., the second adapter added maps to port2).
For KVM (using QCOW2)
KVM deployment often involves using command-line tools like virt-install.
Make sure you have KVM packages installed (qemu-kvm, libvirt-daemon, libvirt-clients, virt-install).
Copy the downloaded .qcow2 image file to a suitable location on your KVM host (e.g., /var/lib/libvirt/images/).
Use the virt-install command to create the VM. Adjust the values as needed:sudo virt-install --name FortiGateVM --memory 4096 --vcpus 2 --disk path=/var/lib/libvirt/images/fortigate.qcow2,format=qcow2,bus=virtio --network bridge=br0,model=virtio --network bridge=br1,model=virtio --import --os-variant generic --graphics none --console pty,target_type=serial
--name: Name of your VM.
--memory: RAM in MB.
--vcpus: Number of virtual CPUs.
--disk: Path to the QCOW2 image. bus=virtio improves disk performance.
--network: Configures network interfaces. bridge=br0 connects to your host’s network bridge. model=virtio improves network performance. Add more --network lines for additional interfaces. The order of these lines matters for FortiGate port mapping (first is port1, second is port2, etc.).
--import: Tells it to use an existing disk image.
--os-variant generic: A safe, portable value; run osinfo-query os if you want to pick a closer match for your host.
--graphics none: Disables graphical console.
--console pty,target_type=serial: Sets up a serial console, which is how you’ll initially access the FortiGate CLI on KVM.
Make sure your KVM host has the necessary network bridges (br0, br1, etc.) configured and connected to your physical networks or VLANs.
For Public Clouds (AWS, Azure, GCP)
Deployment in the cloud involves launching an instance from the marketplace and configuring its networking and security.
Log in to your cloud provider’s management console (AWS, Azure, or Google Cloud).
Go to the service for launching virtual machines (e.g., EC2 in AWS, Virtual Machines in Azure, Compute Engine in GCP).
Start the process to launch a new instance/VM.
Choose Image: Search the Marketplace for “FortiGate” and select the appropriate image (BYOL or PAYG). Remember the license type is fixed once the instance is running.
Choose Instance Type: Select a VM size (instance type) that meets the CPU and RAM requirements for your FortiGate VM and expected traffic.
Network Configuration:
Select the Virtual Private Cloud (VPC) or Virtual Network (VNet) where the FortiGate will be.
Choose the Subnet for the primary network interface (this will typically be FortiGate’s port1 for management).
Add more Network Interfaces and assign them to subnets for your internal, external, or DMZ networks. Pay close attention to the order you add interfaces, as this maps to FortiGate’s port numbering (e.g., eth0 in the cloud VM maps to port1 on FortiGate, eth1 maps to port2, etc.).
Configure Security Groups (AWS), Network Security Groups (NSGs) (Azure), or Firewall Rules (GCP) to allow necessary access to the FortiGate’s management interface (HTTPS, SSH, Ping) from your administrative network. Limit access as much as possible.
Configure Route Tables in your VPC/VNet to direct network traffic through the FortiGate. This is essential for the FortiGate to act as a firewall/gateway.
Storage: Configure the size and type of the main disk.
Review and launch the instance.
Cloud deployments often require more careful planning for networking and security rules compared to on-premises setups.
Step 3: Power On the VM and Initial Configuration
After the VM is deployed, power it on and access its console for the first-time setup.
Power On: Start the virtual machine from your virtualization platform’s or cloud provider’s console.
Access Console:
VMware: Open the VM console tab.
Hyper-V: Right-click the VM and select ‘Connect’.
KVM: Use virsh console <VM_Name> from your KVM host’s command line.
Public Clouds: Use the cloud provider’s serial console feature (e.g., EC2 Serial Console, Azure Serial Console, GCP Serial Port).
Initial Login: The FortiGate VM will boot up. When you see the login prompt:FortiGate-VM login: Type admin and press Enter.FortiGate-VM login: admin Password: Press Enter again (there’s no default password).
Set New Password: You will be immediately asked to set a new password for the admin user. This is required.You are required to change your password immediately. New password: Enter a strong password and press Enter. Confirm it when prompted.
Initial Network Configuration (CLI): It’s best to configure the management interface (port1) using the command-line interface (CLI) first.config system interface edit port1 set mode static set ip 192.168.1.99/24 # Replace with your desired IP and subnet set allowaccess ping http https ssh fgfm # Enable access for web, SSH, etc. set description "Management Interface" next end config router static edit 1 set gateway 192.168.1.1 # Replace with your network's default gateway set device port1 next end config system dns set primary 8.8.8.8 # Replace with your primary DNS server set secondary 8.8.4.4 # Replace with your secondary DNS server end # Save the configuration end
set allowaccess: Allows protocols like HTTP/HTTPS (for the web interface), SSH (for CLI), and Ping.
config router static: Sets up a default route so the FortiGate can reach other networks, including the internet for licensing.
config system dns: Configures DNS servers for name resolution.
Access Web-based Manager: Once port1 has an IP address and a default route, you can access the FortiGate’s web interface from a web browser.https://<FortiGate_Management_IP> You might see a certificate warning, which you can safely bypass for now. Log in with admin and the password you just set.
Step 4: Upload the License File
Applying the license activates all features and enables FortiGuard updates (for threat intelligence) and support.
Access the FortiGate web-based manager via HTTPS.
Go to System > Dashboard > Status. You’ll see the license status (e.g., “Unlicensed”).
Click the ‘Upload License’ button or link. For FortiFlex, enter your token instead of a file.
Browse to the .lic license file you downloaded from the Fortinet Support portal.
Upload the file. The FortiGate will verify it.
The FortiGate will usually need to reboot after the license is applied. Confirm the reboot.
After rebooting, log back into the web interface. The Dashboard should now show your license details.
If you have an activation code (common in some cloud or subscription licenses), you might activate it via the GUI or CLI:
# Example CLI command to register with FortiCare (requires internet access)
execute license update <activation_code>
Step 5: Basic Network and Security Configuration
With the license active, you can now configure the FortiGate to protect your network.
Interface Configuration:
Go to Network > Interfaces.Configure the other interfaces (port2, port3, etc.) that connect to your internal networks, the internet, and any DMZs.Set their IP addresses, subnet masks, and allowed access protocols.If you’re using VLANs, configure VLAN sub-interfaces.Consider assigning interfaces to Zones (Network > Zones) to simplify your firewall policies.
config system interface edit port2 set mode static set ip 10.10.10.1/24 set allowaccess ping https ssh set description "Internal LAN" next edit port3 set mode static set ip 203.0.113.2/29 # Example Public IP set allowaccess ping https ssh # Less access typically on external interfaces set description "External WAN" next # Example: Configure VLAN sub-interface if needed edit port2.10 set vlanid 10 set mode static set ip 10.10.20.1/24 set allowaccess ping https set description "Internal VLAN 10" next end
Firewall Policies:
Go to Policy & Objects > Firewall Policy.Create rules (policies) to control which traffic is allowed or denied between your interfaces/zones. Policies are processed from top to bottom.For each policy, define:
Source Interface/Zone and Destination Interface/ZoneSource Address(es) and Destination Address(es)Service(s) (ports/protocols)Action (Accept or Deny)
Apply Security Profiles (like Antivirus, Web Filter, Intrusion Prevention System) to policies to enable advanced threat protection.
config firewall policy edit 0 # 0 means create a new policy at the top set name "LAN_to_WAN_Outbound" set srcintf "Internal LAN" # Or the specific port, e.g., port2 set dstintf "External WAN" # Or the specific port, e.g., port3 set srcaddr "all" set dstaddr "all" set service "ALL" # Be more specific in a production environment set action accept set nat enable # Enable Network Address Translation for outbound internet access set profile-protocol-options "default" set av-profile "default" # Apply Antivirus scanning set webfilter-profile "default" # Apply Web Filtering set ips-sensor "default" # Apply Intrusion Prevention set application-list "default" # Apply Application Control set ssl-ssh-profile "certificate-inspection" # Basic SSL inspection set logtraffic all # Log all traffic matching this policy next # Example: A general deny policy (often placed at the bottom of the list) edit 0 set name "Deny_All_Implicit" set srcintf "any" set dstintf "any" set srcaddr "all" set dstaddr "all" set service "ALL" set action deny set logtraffic all next end
Routing:
Go to Network > Static Routes.
Verify the default route you configured. Add any other static routes needed to reach specific networks not directly connected to the FortiGate.
If you need dynamic routing (like OSPF or BGP), configure it under Router.
System Settings:
Configure System > Settings (e.g., hostname, time zone, operation mode).
Set up System > FortiGuard for security updates.
Configure System > NTP for accurate time synchronization.
Set up Log & Report > Log Settings to send logs to a FortiAnalyzer, FortiManager, or syslog server for monitoring.
What should you configure after the FortiGate VM is running?
You have deployed and performed the initial configuration of your FortiGate Firewall VM: you got the image, set up its resources, configured basic network access through the CLI, licensed the device, and set up essential interfaces and firewall rules. The real value of the FortiGate comes from the security features you build on top of this base.
Recommended next steps:
Configure more detailed security profiles (Antivirus, IPS, Web Filter, Application Control).
Implement SSL/SSH Inspection for encrypted traffic.
Set up VPNs for secure connectivity. Use IPsec VPN for remote access and site-to-site tunnels, and ZTNA for per-application access. Do not build on SSL VPN tunnel mode, which Fortinet is removing from FortiOS 7.6+ and 8.0.
Configure user authentication (e.g., Local users, RADIUS, LDAP).
Set up centralized logging and monitoring (e.g., with FortiAnalyzer).
Consider configuring High Availability (HA) if you need redundancy (requires two FortiGate VMs).
Keep FortiOS and FortiGuard definitions current, and stay on a supported branch (7.4 or 7.6) so you continue receiving patches.
If you would rather have this designed, deployed, and monitored for you, our managed firewall services and Fortinet solutions cover the full lifecycle, from sizing and licensing to policy tuning and 24/7 monitoring. Always refer to the official FortiGate documentation for your specific FortiOS version and deployment environment.
Choosing the right FortiGate firewall is crucial for maintaining a secure and efficient network. An undersized unit can become a bottleneck, leading to slow performance and a frustrating user experience. Conversely, an oversized unit means you’ve overspent on hardware you don’t fully utilize. At BALANCED+, we believe in finding that perfect equilibrium. This guide will walk you through the essential considerations for properly sizing your FortiGate to ensure optimal performance and robust security.
Why Proper Sizing Matters
Before diving into the “how,” let’s understand the “why.” A correctly sized FortiGate ensures:
Optimal Security: The device can handle the processing demands of all necessary security services (like Intrusion Prevention, Antivirus, Application Control, and SSL Inspection) without bogging down.
Peak Performance: Your network users experience fast and reliable connectivity, without the firewall becoming a chokepoint.
Cost-Effectiveness: You invest in a solution that meets your current and near-future needs without overspending on unnecessary capacity.
Future Scalability: A well-sized unit, with some room for growth, allows for easier adaptation as your business and network demands evolve.
Key Factors to Consider When Sizing Your FortiGate
Sizing a FortiGate isn’t just about matching your internet speed. It’s a multifaceted process. Here are the critical metrics and features to evaluate:
1. Throughput More Than Just a Single Number:
FortiGate datasheets list various throughput figures. It’s vital to understand what each represents:
Firewall Throughput (UDP/TCP): This is the raw packet processing capability of the firewall, typically measured with User Datagram Protocol (UDP) traffic, which has less overhead than Transmission Control Protocol (TCP). While a useful baseline, it doesn’t reflect real-world performance with security services enabled.
Next-Generation Firewall (NGFW) Throughput: This metric reflects performance with key security services like Intrusion Prevention System (IPS) and Application Control enabled. This is often a more realistic number to consider for typical deployments.
Threat Protection Throughput: This is arguably the most critical throughput number for most businesses. It indicates the performance when multiple advanced security services (like IPS, Antivirus, Application Control, and often sandboxing) are active simultaneously. This is the figure you should most closely align with your actual internet bandwidth and internal traffic inspection needs.
SSL/TLS Inspection Throughput: If you plan to decrypt and inspect encrypted traffic (which is increasingly important for security), this figure is paramount. SSL/TLS inspection is resource-intensive, and the dedicated throughput for it will be significantly lower than other throughput metrics.
IPSec VPN Throughput: If you rely heavily on site-to-site or remote access VPNs, ensure the FortiGate model can handle your encrypted VPN traffic demands.
BALANCED+ Tip: Always focus on the “Threat Protection Throughput” and “SSL/TLS Inspection Throughput” (if applicable) as your primary guides, rather than just the basic firewall throughput.
2. Concurrent Sessions:
This refers to the total number of active connections passing through the firewall at any given moment. Every time a user accesses a website, sends an email, or uses a network application, one or more sessions are created.
Consider: The number of users, the types of applications they use (some applications, like peer-to-peer, open many sessions), and the number of IoT or always-on devices on your network.
BALANCED+ Tip: It’s wise to choose a model with a concurrent session capacity that comfortably exceeds your current peak usage to accommodate growth and unexpected spikes.
3. New Sessions Per Second (CPS):
This metric indicates how quickly the FortiGate can establish new connections. A low CPS rate can lead to delays in opening new web pages or starting new applications, especially in environments with many users or services initiating connections frequently.
Consider: High-traffic environments, web servers, or applications that rapidly open and close connections.
BALANCED+ Tip: Don’t underestimate this metric, especially if you have a dynamic environment with many users initiating new tasks simultaneously.
4. Interface Requirements:
Consider the number and types of network interfaces you need:
Ports: How many LAN, WAN, DMZ, and other segments do you need to connect?
Speed: Do you require 1Gbps, 10Gbps, or even faster ports?
Type: Do you need copper (RJ45) or fiber (SFP/SFP+) interfaces?
Power over Ethernet (PoE): Will you be powering devices like access points or IP phones directly from the firewall?
5. VPN Requirements:
If you use Virtual Private Networks (VPNs):
Site-to-Site Tunnels: How many persistent VPN connections to other offices or cloud environments do you need?
Remote Access Users: How many concurrent remote users will connect via SSL VPN or IPsec VPN?
BALANCED+ Tip: Ensure the chosen model has sufficient VPN throughput and tunnel capacity for your needs.
6. Other Feature Impacts:
Certain features can significantly impact resource utilization:
SD-WAN: If you plan to leverage FortiGate’s robust SD-WAN capabilities, factor in the overhead for link monitoring and traffic steering.
Logging and Reporting: Extensive logging requires storage and processing power. If you’re sending logs to a FortiAnalyzer or SIEM, this is less of a burden on the FortiGate itself.
High Availability (HA): If you require a redundant setup, you’ll typically need two identical FortiGate units.
7. Future Growth:
Always plan for the future. Consider:
User Growth: Will your number of employees or network users increase?
Bandwidth Increases: Do you anticipate upgrading your internet connection?
New Applications/Services: Will you be deploying new technologies that increase network load?
BALANCED+ Recommendation: Aim to size your FortiGate to handle your current needs plus 20-30% capacity for future growth over the next 3-5 years.
Common Sizing Pitfalls to Avoid
Focusing Solely on Firewall Throughput: Ignoring NGFW, Threat Protection, and SSL Inspection throughput.
Underestimating Concurrent Sessions: Leading to dropped connections and poor user experience.
Forgetting SSL Inspection Impact: This is a major performance hit if not accounted for.
Not Planning for Peak Loads: Sizing only for average use can cause issues during busy periods.
Ignoring Future Growth: Leading to a premature and costly upgrade.
Not Understanding Your Traffic: Perform a network assessment to understand your actual usage patterns before making a decision.
Optimizing Performance Beyond Sizing
Once you have your FortiGate, remember that configuration plays a vital role in performance:
Firmware Updates: Keep your FortiOS firmware up-to-date for the latest performance improvements and security patches.
Policy Optimization: Streamline firewall policies and remove unused or redundant rules.
Selective SSL Inspection: Only inspect traffic that needs it. Create exemptions for trusted, high-volume traffic where appropriate.
Resource Monitoring: Regularly monitor CPU, memory, and session load to identify potential bottlenecks.
Hardware Session Offloading: Ensure features like hardware acceleration are enabled where appropriate.
Get a Free Expert Sizing Assessment
Properly sizing a FortiGate firewall is a critical step in building a secure and high-performing network. It requires a careful analysis of your current environment, security needs, and future growth plans.
Ready to find the perfect FortiGate for your organization? Let the experts at BALANCED+ help! We offer a free, no-obligation sizing assessment. Fill out our form, and one of our certified engineers will help you determine the ideal FortiGate model to meet your specific requirements.
Choose the Right FortiGate From The Start
Take our quick quiz to get a personalized suggestion for your business.