In today’s complex and ever-evolving threat landscape, no single security solution can stand alone. Organizations are increasingly adopting a multi-layered defense strategy, deploying best-of-breed tools for different security functions. However, without proper integration, these disparate solutions can create visibility gaps, slow down response times, and ultimately weaken your overall security posture. This is where the power of integrating your FortiGate Next-Generation Firewall (NGFW) with your broader security ecosystem comes into play.
Fortinet’s Security Fabric is designed with integration at its core, enabling seamless communication and coordinated action across a wide array of security tools. By connecting FortiGate with other elements of your security infrastructure, you can unlock a host of benefits, transforming your defenses from a collection of individual components into a unified and automated security powerhouse.
Why Integrate? The Power of a Connected Defense
Integrating your FortiGate NGFW offers compelling advantages:
Enhanced Visibility: Gain a holistic view of your threat landscape by correlating FortiGate’s network security data with insights from other solutions like Security Information and Event Management (SIEM), Endpoint Detection and Response (EDR), and Cloud Access Security Brokers (CASB). This comprehensive visibility allows for faster and more accurate threat detection.
Accelerated Incident Response: Automate and orchestrate responses to threats across multiple security layers. For instance, a threat detected on an endpoint by an EDR solution can trigger automated policy changes on the FortiGate to block malicious traffic, or an alert from your SIEM can initiate a response action via a Security Orchestration, Automation and Response (SOAR) platform integrated with FortiGate.
Improved Operational Efficiency: Streamline security operations by centralizing management, reporting, and policy enforcement where possible. Integration reduces manual intervention, minimizes redundant tasks, and frees up security teams to focus on strategic initiatives.
Consistent Security Policy Enforcement: Ensure that security policies are consistently applied and enforced across your network, endpoints, and cloud environments. This is crucial for maintaining a strong security posture and meeting compliance requirements.
Maximized ROI on Security Investments: Get the most out of your existing security tools by enabling them to work together. Integration amplifies the capabilities of each individual solution, delivering a greater return on your overall security investment.
Key Integration Points for Your FortiGate
FortiGate’s versatility allows it to integrate with a wide range of security solutions within your ecosystem:
Security Information and Event Management (SIEM): FortiGate can forward comprehensive logs (traffic, threat, system, etc.) to SIEM platforms (e.g., Splunk, QRadar, Azure Sentinel, FortiSIEM). This enables centralized security analytics, correlation of events from across the enterprise, and long-term threat hunting. SIEMs can also send information back to FortiGate, perhaps to update blocklists or trigger specific actions.
Security Orchestration, Automation and Response (SOAR): SOAR platforms (e.g., Palo Alto Networks Cortex XSOAR, Splunk SOAR, FortiSOAR) leverage FortiGate’s APIs to automate incident response playbooks. For example, a SOAR playbook could automatically isolate an infected endpoint by instructing FortiGate to quarantine it, block a malicious IP address, or update a web filtering profile.
Endpoint Detection and Response (EDR): Integrating with EDR solutions (e.g., CrowdStrike Falcon, SentinelOne, FortiEDR) provides a powerful combination of network and endpoint security. If an EDR agent detects a compromised endpoint, it can share this information with FortiGate, which can then segment the device or block its outbound communication to command-and-control servers. Conversely, FortiGate can alert EDR solutions to suspicious network activity originating from an endpoint.
Network Access Control (NAC): Solutions like Cisco ISE or FortiNAC integrate with FortiGate to enforce granular access policies based on user identity, device posture, and other contextual information. This ensures that only compliant and authorized devices can access network resources.
Cloud Access Security Broker (CASB): As organizations increasingly adopt cloud applications, CASB integration (e.g., Netskope, McAfee Skyhigh, FortiCASB) allows FortiGate to extend visibility and control over SaaS applications, ensuring data protection and threat prevention in the cloud.
Cloud Security Platforms (AWS, Azure, GCP): FortiGate offers virtual appliances and integrations with major cloud providers. This enables consistent security policy enforcement and visibility across hybrid and multi-cloud environments. Fabric Connectors automate the synchronization of dynamic address objects and security policies.
Identity Management (IdM) / Multi-Factor Authentication (MFA): Integration with IdM solutions (e.g., Okta, Azure AD) and MFA providers strengthens user authentication and access control to network resources and applications protected by FortiGate.
Threat Intelligence Platforms (TIPs): FortiGate can consume threat intelligence feeds from TIPs, enriching its threat detection capabilities with the latest indicators of compromise (IoCs). FortiGuard Labs, Fortinet’s own threat intelligence service, is a core component of this.
How to Achieve Seamless Integration: The Fortinet Security Fabric
Fortinet facilitates these integrations through several key mechanisms:
Fortinet Security Fabric: This is the foundation of Fortinet’s integrated security architecture. It enables different Fortinet products and Fabric-Ready partner solutions to communicate, share threat intelligence, and coordinate responses in real-time.
FortiOS: The common operating system across FortiGate and other Fortinet solutions provides a consistent set of APIs and a unified management experience.
Fabric Connectors: These are pre-built integration points that simplify the connection between FortiGate (or FortiManager) and third-party solutions, particularly cloud platforms (AWS, Azure, GCP, Oracle Cloud) and SDN environments (Cisco ACI, VMware NSX). They allow for automated synchronization of objects and policies.
APIs (Application Programming Interfaces): FortiGate offers robust REST APIs that allow for deep integration with a wide variety of third-party tools, enabling custom automation and orchestration.
FortiManager & FortiAnalyzer: These central management and analytics platforms play a crucial role in orchestrating policies and correlating data across the Security Fabric, including integrated third-party solutions.
Scripting & Automation Stitches: FortiOS allows for the creation of automation stitches, which are if-then rules that can trigger actions (including API calls to external systems) based on specific events detected by FortiGate.
Best Practices for Successful FortiGate Integration
To ensure a smooth and effective integration process, consider the following best practices:
Clearly Define Your Goals: Understand what you want to achieve with the integration (e.g., improved threat detection, faster response, centralized visibility). This will guide your integration strategy.
Start with a Plan: Identify the key integration points within your ecosystem. Prioritize integrations based on their potential impact on your security posture and operational efficiency.
Leverage the Fortinet Security Fabric: Whenever possible, utilize Fortinet’s native integration capabilities and Fabric-Ready partner solutions for a more streamlined experience.
Understand API Capabilities and Limitations: If using APIs, thoroughly review the documentation for both FortiGate and the third-party solution to understand what data can be exchanged and what actions can be performed. Be mindful of API versioning.
Secure Your Integration Points: Ensure that all API keys, credentials, and communication channels used for integration are properly secured and regularly audited.
Test Thoroughly: Before deploying integrations into a production environment, conduct comprehensive testing in a lab or staging environment to ensure they function as expected and do not introduce new vulnerabilities.
Monitor and Maintain: Regularly monitor the health and performance of your integrations. Keep all components (FortiOS, connector versions, third-party software) up to date with the latest patches and releases.
Document Everything: Maintain clear documentation of your integration configurations, including API endpoints, credentials (securely stored), data mappings, and troubleshooting steps.
Foster Vendor Collaboration: Don’t hesitate to work with Fortinet support and the support teams of your other security vendors to resolve any integration challenges.
Conclusion: Unify Your Defenses with FortiGate
Integrating your FortiGate NGFW with your broader security ecosystem is no longer a luxury but a necessity for robust cyber defense. By breaking down security silos and fostering seamless communication and automation, you can significantly enhance your threat detection capabilities, accelerate incident response, and improve overall operational efficiency. Embrace the power of the Fortinet Security Fabric and its rich integration capabilities to build a truly unified and resilient security posture.
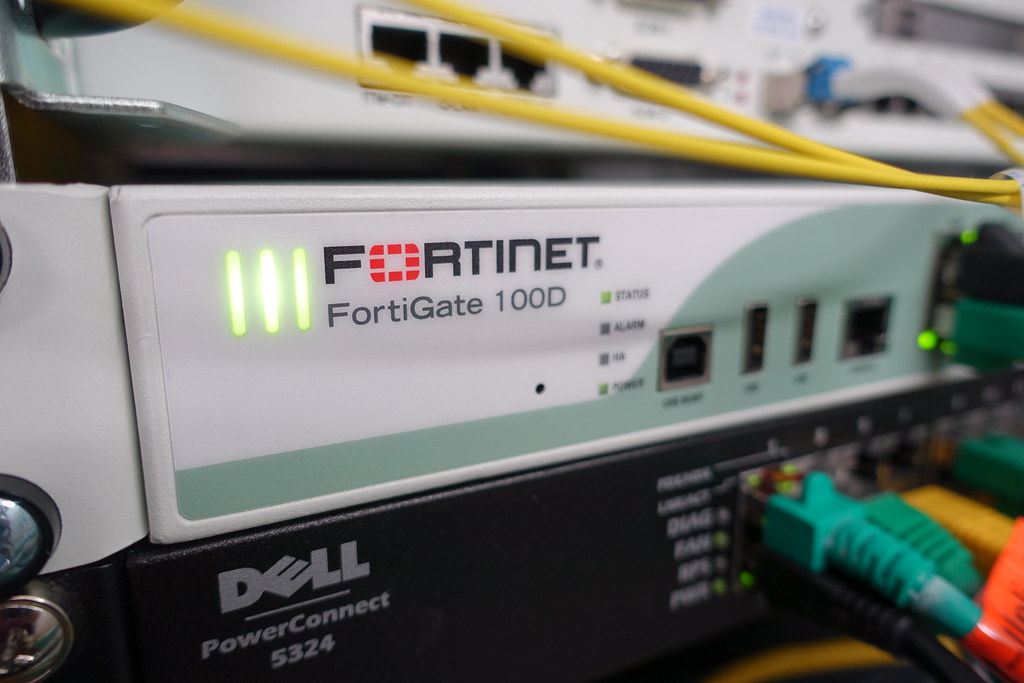
For many businesses, FortiGate firewalls are the go-to choice for their advanced security capabilities.
However, owning a powerful FortiGate device is only the first step. Effectively managing itensuring optimal configuration, constant monitoring, and consistent updatesdemands specialized expertise and unwavering attention. This presents a significant challenge for many businesses, and it’s precisely where managed firewall services can transform your security posture.
What Exactly is a Managed FortiGate Service?
A Managed FortiGate Service is a comprehensive solution where a third-party expert, typically a Managed Security Service Provider (MSSP), assumes full responsibility for the day-to-day management, monitoring, and maintenance of your business’s FortiGate firewall(s).
Think of it as having an elite team of Fortinet certified professionals dedicated to your firewall security, without the significant overhead of hiring, training, and retaining them in-house. This service extends far beyond merely purchasing FortiGate hardware or subscribing to FortiGuard security feeds (like antivirus or web filtering). Its about the ongoing, expert operational management of your entire FortiGate ecosystem by a dedicated outsourced firewall management team.
Key components of a FortiGate managed service typically include:
24/7/365 Monitoring & Alerting: Continuous oversight of your firewall’s health, performance, and security events, with immediate alerts for any suspicious activity.
Configuration Management & Optimization: Expert setup and ongoing fine-tuning of your firewall policies and settings to ensure maximum protection and performance tailored to your specific business needs.
Security Policy Management & Updates: Implementing, managing, and updating security rules to adapt to changing threats and business requirements.
Firmware & Patch Management: Ensuring your FortiGate device is always running the latest secure firmware and patches to protect against known vulnerabilities.
Threat Intelligence Integration & Proactive Defense: Leveraging up-to-date threat intelligence feeds to proactively block emerging threats before they can impact your network.
Security Incident Response Support: Expert assistance in the event of a security incident, helping to contain threats and minimize damage.
Regular Reporting & Performance Reviews: Transparent reporting on firewall activity, security posture, and service performance, keeping you informed.
Why Your Business Needs a Managed FortiGate Service
Opting for a managed FortiGate solution offers a multitude of advantages that directly address common business challenges:
Enhanced Security & Reduced Risk: This is paramount. With a managed service, you gain access to certified Fortinet experts whose sole focus is security. They ensure your firewall is optimally configured, leveraging advanced features and best practices. This proactive approach significantly strengthens your defenses against malware, ransomware, intrusions, and other cyber threats.
Cost-Effectiveness & Predictable Spending: Hiring, training, and retaining in-house cybersecurity specialists with Fortinet expertise is expensive. A managed service provides access to this expertise at a fraction of the cost, often through a predictable monthly or annual fee. This helps you avoid the high costs associated with security breaches that can result from mismanagement.
Access to Specialized Expertise & Advanced Tools: MSSPs live and breathe Fortinet security services. They possess deep knowledge of FortiOS (FortiGate’s operating system) and the broader Fortinet Security Fabric. They also invest in advanced security tools and threat intelligence platforms that might be too costly or complex for an individual business to acquire and manage.
Free Up Your Internal IT Team: Your internal IT team likely juggles numerous responsibilities. Outsourced firewall management frees them from the time-consuming tasks of firewall monitoring, patching, and troubleshooting. This allows them to focus on core business initiatives, strategic IT projects, and innovation, rather than being bogged down in specialized security operations.
Improved Compliance & Auditing: Many industries are subject to strict data security and privacy regulations (e.g., HIPAA, PCI DSS, GDPR). A managed FortiGate service can help you meet these requirements by implementing necessary controls, providing detailed logging, and generating reports crucial for audit trails and demonstrating due diligence.
Scalability & Business Agility: As your business grows or your needs change, your security infrastructure must adapt. A managed service provider can easily scale your security services up or down, ensuring your protection aligns with your evolving business landscape without requiring significant new internal investments.
Peace of Mind & Proactive Support: Knowing that your critical security infrastructure is being monitored and managed around the clock by experts provides invaluable peace of mind. Issues are often detected and resolved proactively, before they can escalate into significant problems or business disruptions.
Signs Your Business Would Benefit from Outsourced Firewall Management
Still unsure if this is the right move? Consider if any of these situations sound familiar:
Your IT team is stretched thin, and firewall management often takes a backseat to other urgent tasks.
You lack in-house personnel with current Fortinet certifications or deep, specialized experience in managing FortiGate devices.
You’re concerned your firewall configuration isn’t optimized for your specific threats or business needs.
Keeping up with the constant stream of firmware updates, security patches, and emerging threat intelligence is a struggle.
You’ve experienced security incidents, near-misses, or are increasingly worried about the potential impact of a breach.
Your business needs to adhere to specific industry compliance mandates that necessitate robust firewall management and reporting.
You desire a more proactive security posture, moving beyond simply reacting to problems.
Your business is growing, and your security requirements are becoming more complex than your current resources can handle.
If you nodded along to one or more of these points, its a strong indicator that exploring a managed FortiGate solution is a prudent step.
Choosing the Right Managed FortiGate Service Provider
Not all MSSPs are created equal. When considering a provider for your Fortinet security services, look for one with proven Fortinet expertise, official certifications (like NSE – Fortinet Network Security Expert), a strong track record with businesses similar to yours, and transparent service level agreements (SLAs). (Perhaps a topic for another day: “How to Select the Best Managed FortiGate Provider.”)
Conclusion: Secure Your Business with Expert FortiGate Management
A Managed FortiGate Service isn’t just about offloading tasks; it’s a strategic decision to elevate your cybersecurity, control costs, and empower your business. It allows you to leverage the full, powerful potential of your FortiGate investment without the inherent complexities and resource drain of managing it entirely in-house. By partnering with the right provider, you gain a dedicated security ally focused on protecting your critical assets.
Ready to enhance your security posture, reduce IT burdens, and gain true peace of mind? Contact us today to learn more about our Managed FortiGate Services and how we can tailor a solution to your unique business needs.
For small to mid-sized businesses and enterprise branch offices, finding a solution that offers comprehensive protection without breaking the bank or requiring a dedicated IT army can be a challenge. Enter the FortiGate 81F, a compact yet powerful Next-Generation Firewall (NGFW) designed to deliver enterprise-grade security with ease of use.
The FortiGate 81F series is a desktop form-factor appliance that packs a serious punch in terms of security and networking capabilities. It’s engineered to protect against today’s sophisticated cyber threats while also enabling secure SD-WAN functionality, making it a versatile choice for organizations looking to optimize their network performance and security simultaneously.
Struggling To Choose The Right Fortigate?
Take our quick quiz to get a personalized suggestion for your business.
Start Quiz
Key Features at a Glance:
The FortiGate 81F boasts an impressive set of features, including:
High-Performance Threat Protection: Powered by Fortinet’s custom SPU (Security Processing Unit) SOC4 (System on a Chip), the 81F delivers excellent performance for firewall, VPN, intrusion prevention (IPS), and threat protection.
Secure SD-WAN: Built-in SD-WAN capabilities allow organizations to optimize application performance and reduce WAN costs by intelligently steering traffic across multiple WAN links.
Comprehensive Security Services: Leverages FortiGuard Labs’ AI-powered threat intelligence for protection against malware, exploits, malicious websites, and both known and unknown attacks.
Connectivity: Offers a good range of port options, including multiple GE RJ45 ports and shared media WAN ports (RJ45/SFP).
Onboard Storage: Includes onboard SSD storage for logging, reporting, and WAN optimization.
Simplified Management: Can be managed through the intuitive FortiOS operating system and integrates with the Fortinet Security Fabric.
Compact, Fanless Design: Easy to deploy in various environments with silent operation.
Who is the FortiGate 81F Meant For?
The FortiGate 81F is specifically tailored for a few key segments:
Small to Mid-Sized Businesses (SMBs): Ideal for organizations requiring robust security without extensive IT resources, typically in the range of 50-250 users/devices.
Enterprise Branch Offices: Serves as an excellent secure SD-WAN solution for distributed locations, ensuring consistent security policies and optimized application access.
Retail and Distributed Environments: Suitable for businesses with multiple retail outlets or remote sites needing secure connectivity and centralized management.
Organizations Seeking Consolidated Security: Benefits companies looking to simplify their security infrastructure by combining multiple point products into a single appliance.
FortiGate 81F: Comprehensive Fact Sheet
Here’s a more detailed look at the FortiGate 81F’s specifications:
Hardware Specifications:
Processor: Fortinet SOC4 (System on a Chip with SPU – Security Processing Unit)
GE RJ45/SFP Shared Media Pairs: 2
GE RJ45 Internal Ports: 6
GE RJ45 FortiLink Ports (Default): 2
USB Port: 1 (USB 3.0)
Console Port: 1 (RJ45)
Internal Storage: 1x 128 GB SSD
Trusted Platform Module (TPM): Yes
Bluetooth Low Energy (BLE): Yes
Form Factor: Desktop (Wall-mountable, Rack tray optional)
Dimensions (H x W x L):
Inches: 1.6 x 8.5 x 7.0
Millimeters: 38.5 x 216 x 178
Weight: 2.4 lbs (1.1 kg)
Power Supply: External DC Power Adapter (12V DC, 3A). Dual power supplies optional for redundancy.
Common Criteria (EAL 4+) (varies by FortiOS version)
Other relevant industry certifications (e.g., FIPS, USGv6)
(Note: Performance values are “up to” and can vary depending on the system configuration, network conditions, and services enabled. Always refer to the official Fortinet datasheet for the most current and precise specifications.)
Why Consider the FortiGate 81F?
Beyond its technical specifications, the FortiGate 81F offers several key benefits:
Strong Security Posture: Provides advanced threat protection to safeguard sensitive data and ensure business continuity.
Improved Network Performance: SD-WAN capabilities enhance application performance and user experience.
Reduced Complexity: Consolidates networking and security functions into a single, easy-to-manage platform.
Scalability: While ideal for smaller environments, it can integrate into the larger Fortinet Security Fabric, allowing for scalability as the business grows.
Cost-Effectiveness: Offers a compelling total cost of ownership (TCO) by combining multiple functionalities and reducing the need for separate security appliances.
In conclusion, the FortiGate 81F is a formidable contender in the NGFW market, offering a well-rounded package of security, performance, and connectivity for small to mid-sized organizations and enterprise branches. If you’re looking for a reliable and feature-rich security appliance that won’t overwhelm your budget or your IT team, the FortiGate 81F is certainly worth a closer look.
Deploying a FortiGate firewall VM comes down to five steps: download and verify the correct FortiGate-VM image for your platform, import or launch it, run the first-time console setup to bring up the management interface, apply your license, then build out your interfaces and firewall policies. The exact clicks vary by hypervisor or cloud, but the sequence is the same everywhere. This guide walks through each step for VMware vSphere, Microsoft Hyper-V, KVM, and the major public clouds, using current FortiOS releases.
FortiGate-VM
FortiGate-VM is the virtual-machine edition of Fortinet’s FortiGate next-generation firewall. It runs the same FortiOS as the hardware appliances, so you get firewall policies, IPS, antivirus, web filtering, and VPN inside a virtualized data center or public cloud instead of on a physical box. Licensing is decoupled from the image: you deploy the image, then activate features and performance tiers with a license.
The image is free to download but does nothing useful until licensed. Decide your license model (BYOL, PAYG, or FortiFlex) and your FortiOS branch before you deploy, because on public cloud the license type is fixed for the life of the instance. As a Fortinet Advanced Partner since 2003, we deploy and manage FortiGate firewalls for mid-market clients across the GTA every week; the notes below reflect what actually trips people up.
Which FortiOS version should you deploy in 2026?
For production, deploy on FortiOS 7.4 or 7.6. These are the mature, widely deployed branches; 7.6.7 is the newest 7.6 patch, and many teams standardize on a slightly earlier, well-soaked release such as 7.6.6. FortiOS 8.0 was announced at Accelerate 2026 as the newest feature release, but it is not yet a production recommendation, so keep it in the lab for now.
If you are still on FortiOS 7.2.x, plan your upgrade now: 7.2 reaches end-of-support in September 2026, after which it stops receiving fixes and vulnerability patches. Choosing the right branch at deploy time avoids a forced migration a few months later.
Sept 2026
FortiOS 7.2.x reaches end-of-support; move new and existing FortiGate-VMs to 7.4 or 7.6 before then (Fortinet EOS notice).
Warning:
Fortinet is removing SSL VPN tunnel mode from FortiOS on the 7.6+ and 8.0 branches. Do not build a new remote-access design around SSL VPN. Use IPsec VPN for tunnel-based remote access and site-to-site connections, and ZTNA for per-application access. If you are migrating an older FortiGate, budget time to convert existing SSL VPN users to IPsec.
What do you need before deploying a FortiGate VM?
Before you start the deployment, make sure you have the following:
FortiGate VM License:
You need the correct license file (.lic), activation code, or FortiFlex token for your FortiGate VM. This determines the features, performance (how much traffic it can handle), and support you get.
Licenses are typically BYOL (Bring Your Own License), meaning you buy the license separately, or PAYG / on-demand (Pay-As-You-Go), found in cloud marketplaces where the software cost is part of the hourly or monthly fee. FortiFlex is a points-based usage model for organizations running many VMs. See the comparison below.
Virtualization Platform or Cloud Account:
You need access to a supported virtualization platform (like VMware vSphere, Microsoft Hyper-V, KVM) or a public cloud account (like AWS, Azure, GCP).
Ensure you have administrative access to create VMs, set up networks, and manage storage.
FortiGate VM Image:
Download the correct FortiGate VM image file for your platform from the Fortinet Support portal.
Common image formats include:
VMware:.ova (a single file for easy deployment) or .ovf/.vmdk.
Microsoft Hyper-V:.vhd or .vhdx.
KVM:.qcow2.
Public Clouds: Images are usually available directly in their marketplaces.
Important: After downloading, verify the file’s integrity using a checksum (SHA256 is preferred; MD5 is also published). Compare the checksum you calculate with the one provided on the Fortinet Support portal.
System Resources:
Ensure your virtualization environment or cloud account has enough CPU, RAM, storage, and network interfaces for the VM. Refer to the FortiGate VM datasheet for minimum and recommended specifications.
CPU: At least 1 virtual CPU, but 2 or more are recommended for better performance.
RAM: At least 2GB, but 4GB or more is often recommended, especially if you plan to use many security features.
Storage: A system disk is included with the image. You might need additional virtual disks for logging.
Network Interfaces: FortiGate VMs need multiple virtual network interfaces (vNICs) to connect to different parts of your network (e.g., management, internal network, external internet connection).
Network Configuration Plan:
Before you start, plan your network setup carefully.
Decide on IP addresses, subnet masks, default gateways, and DNS servers for each FortiGate interface (e.g., management, internal, external).
Consider if you’ll use VLANs (Virtual Local Area Networks) or advanced features like Link Aggregation (LAG) for network redundancy or increased speed.
Plan your security zones (e.g., internal, external, DMZ) which will help organize your firewall rules.
BYOL vs PAYG vs FortiFlex: which license do you pick?
On public cloud the license type is fixed for the life of the instance, so choose deliberately. BYOL suits predictable, long-running deployments and unlocks the full feature set and virtual domains; PAYG is fastest to stand up and best for short-lived or bursty workloads; FortiFlex fits organizations juggling many VMs that want pooled, usage-based consumption.
License model
How you pay
Best for
Notes
BYOL
Buy the license up front, apply the .lic file or token
Predictable, long-running VMs on any platform
Full feature set and VDOM support; portable across environments
PAYG / on-demand
Hourly or monthly via the cloud marketplace
Short-lived, test, or bursty cloud workloads
Packaged as unified threat management; no VDOMs; type is fixed for the instance’s life
FortiFlex
Points-based, consumption metered daily
Enterprises and MSSPs running many VMs
Apply a FortiFlex token; supports vCPU hot-add up to the entitlement
How do you deploy the FortiGate VM image, step by step?
The deployment process generally involves importing the VM image into your virtualization environment or launching it in the cloud, followed by initial setup. The five steps below take you from download to a licensed, policy-enforcing firewall.
Step 1: Download and Verify the FortiGate VM Image
Choose a supported FortiOS version (7.4 or 7.6) and the correct image for your platform (e.g., FGT_VM64 for VMware, FGT_VM64_HV for Hyper-V, FGT_VM64_KVM for KVM, or the relevant cloud image).
Download the VM image file.
Verify the Download: To ensure the file isn’t corrupted, calculate its checksum.# Example for Linux/macOS md5sum /path/to/your/fortigate_vm.ova sha256sum /path/to/your/fortigate_vm.ova Compare the result with the checksum listed on the Fortinet Support portal. If they don’t match, download the file again.
Step 2: Deploy the VM Image on Your Platform
The way you deploy the image changes depending on your virtualization or cloud platform.
For VMware vSphere (using OVA)
An OVA file is a bundled package that makes deployment easy.
In the vSphere Client, right-click your Datacenter or Cluster and select ‘Deploy OVF Template…’.
Choose ‘Local file’ and browse to your downloaded .ova file. Click ‘Next’.
Give your virtual machine a name and choose where to store it. Click ‘Next’.
Select the host or cluster where the VM will run. Click ‘Next’.
Review the template details. Click ‘Next’.
Configuration: If the OVA offers different VM sizes (e.g., different CPU/RAM), choose the one that matches your license and resource plan. Click ‘Next’.
Storage: Select the datastore for the VM files.
Disk Provisioning: ‘Thin Provision’ is recommended to save disk space, as the disk grows only as data is written.
Click ‘Next’.
Network Mapping: This is crucial. Map the networks in the OVA template (like Network 1, Network 2) to your actual network port groups in vSphere (e.g., VM Network, Internal_VLAN10). Ensure that Network 1 from the OVA maps to the network you want to use for the FortiGate’s port1 (the default management interface). Click ‘Next’.
Review all settings and click ‘Finish’ to start the deployment.
Interface order equals port order. Whatever hypervisor or cloud you use, the first vNIC becomes port1, the second becomes port2, and so on. Map your management network to the first interface, and add the rest in the order you want them numbered. Getting this wrong is the most common reason a fresh FortiGate-VM is unreachable after boot.
For Microsoft Hyper-V (using VHD/VHDX)
You’ll create a new VM and attach the downloaded virtual hard disk.
Open Hyper-V Manager.
In the Actions pane, select ‘New’ > ‘Virtual Machine…’. Click ‘Next’.
Give the VM a name. Click ‘Next’.
Specify Generation: FortiGate VMs typically support ‘Generation 1’. Check Fortinet’s documentation for your specific VM version if you’re unsure. Click ‘Next’.
Assign Memory: Set the amount of RAM for the VM. Click ‘Next’.
Configure Networking: Connect the first network adapter (which will be FortiGate’s port1) to a virtual switch that allows access to your management network. You can add more network adapters later. Click ‘Next’.
Connect Virtual Hard Disk: Select ‘Use an existing virtual hard disk’ and browse to your downloaded .vhd or .vhdx file. Click ‘Next’.
Review the summary and click ‘Finish’.
After the VM is created, you might need to go into its settings in Hyper-V Manager to add more network adapters and connect them to your internal or external virtual switches. The order in which you add these adapters will typically determine which FortiGate port they map to (e.g., the second adapter added maps to port2).
For KVM (using QCOW2)
KVM deployment often involves using command-line tools like virt-install.
Make sure you have KVM packages installed (qemu-kvm, libvirt-daemon, libvirt-clients, virt-install).
Copy the downloaded .qcow2 image file to a suitable location on your KVM host (e.g., /var/lib/libvirt/images/).
Use the virt-install command to create the VM. Adjust the values as needed:sudo virt-install --name FortiGateVM --memory 4096 --vcpus 2 --disk path=/var/lib/libvirt/images/fortigate.qcow2,format=qcow2,bus=virtio --network bridge=br0,model=virtio --network bridge=br1,model=virtio --import --os-variant generic --graphics none --console pty,target_type=serial
--name: Name of your VM.
--memory: RAM in MB.
--vcpus: Number of virtual CPUs.
--disk: Path to the QCOW2 image. bus=virtio improves disk performance.
--network: Configures network interfaces. bridge=br0 connects to your host’s network bridge. model=virtio improves network performance. Add more --network lines for additional interfaces. The order of these lines matters for FortiGate port mapping (first is port1, second is port2, etc.).
--import: Tells it to use an existing disk image.
--os-variant generic: A safe, portable value; run osinfo-query os if you want to pick a closer match for your host.
--graphics none: Disables graphical console.
--console pty,target_type=serial: Sets up a serial console, which is how you’ll initially access the FortiGate CLI on KVM.
Make sure your KVM host has the necessary network bridges (br0, br1, etc.) configured and connected to your physical networks or VLANs.
For Public Clouds (AWS, Azure, GCP)
Deployment in the cloud involves launching an instance from the marketplace and configuring its networking and security.
Log in to your cloud provider’s management console (AWS, Azure, or Google Cloud).
Go to the service for launching virtual machines (e.g., EC2 in AWS, Virtual Machines in Azure, Compute Engine in GCP).
Start the process to launch a new instance/VM.
Choose Image: Search the Marketplace for “FortiGate” and select the appropriate image (BYOL or PAYG). Remember the license type is fixed once the instance is running.
Choose Instance Type: Select a VM size (instance type) that meets the CPU and RAM requirements for your FortiGate VM and expected traffic.
Network Configuration:
Select the Virtual Private Cloud (VPC) or Virtual Network (VNet) where the FortiGate will be.
Choose the Subnet for the primary network interface (this will typically be FortiGate’s port1 for management).
Add more Network Interfaces and assign them to subnets for your internal, external, or DMZ networks. Pay close attention to the order you add interfaces, as this maps to FortiGate’s port numbering (e.g., eth0 in the cloud VM maps to port1 on FortiGate, eth1 maps to port2, etc.).
Configure Security Groups (AWS), Network Security Groups (NSGs) (Azure), or Firewall Rules (GCP) to allow necessary access to the FortiGate’s management interface (HTTPS, SSH, Ping) from your administrative network. Limit access as much as possible.
Configure Route Tables in your VPC/VNet to direct network traffic through the FortiGate. This is essential for the FortiGate to act as a firewall/gateway.
Storage: Configure the size and type of the main disk.
Review and launch the instance.
Cloud deployments often require more careful planning for networking and security rules compared to on-premises setups.
Step 3: Power On the VM and Initial Configuration
After the VM is deployed, power it on and access its console for the first-time setup.
Power On: Start the virtual machine from your virtualization platform’s or cloud provider’s console.
Access Console:
VMware: Open the VM console tab.
Hyper-V: Right-click the VM and select ‘Connect’.
KVM: Use virsh console <VM_Name> from your KVM host’s command line.
Public Clouds: Use the cloud provider’s serial console feature (e.g., EC2 Serial Console, Azure Serial Console, GCP Serial Port).
Initial Login: The FortiGate VM will boot up. When you see the login prompt:FortiGate-VM login: Type admin and press Enter.FortiGate-VM login: admin Password: Press Enter again (there’s no default password).
Set New Password: You will be immediately asked to set a new password for the admin user. This is required.You are required to change your password immediately. New password: Enter a strong password and press Enter. Confirm it when prompted.
Initial Network Configuration (CLI): It’s best to configure the management interface (port1) using the command-line interface (CLI) first.config system interface edit port1 set mode static set ip 192.168.1.99/24 # Replace with your desired IP and subnet set allowaccess ping http https ssh fgfm # Enable access for web, SSH, etc. set description "Management Interface" next end config router static edit 1 set gateway 192.168.1.1 # Replace with your network's default gateway set device port1 next end config system dns set primary 8.8.8.8 # Replace with your primary DNS server set secondary 8.8.4.4 # Replace with your secondary DNS server end # Save the configuration end
set allowaccess: Allows protocols like HTTP/HTTPS (for the web interface), SSH (for CLI), and Ping.
config router static: Sets up a default route so the FortiGate can reach other networks, including the internet for licensing.
config system dns: Configures DNS servers for name resolution.
Access Web-based Manager: Once port1 has an IP address and a default route, you can access the FortiGate’s web interface from a web browser.https://<FortiGate_Management_IP> You might see a certificate warning, which you can safely bypass for now. Log in with admin and the password you just set.
Step 4: Upload the License File
Applying the license activates all features and enables FortiGuard updates (for threat intelligence) and support.
Access the FortiGate web-based manager via HTTPS.
Go to System > Dashboard > Status. You’ll see the license status (e.g., “Unlicensed”).
Click the ‘Upload License’ button or link. For FortiFlex, enter your token instead of a file.
Browse to the .lic license file you downloaded from the Fortinet Support portal.
Upload the file. The FortiGate will verify it.
The FortiGate will usually need to reboot after the license is applied. Confirm the reboot.
After rebooting, log back into the web interface. The Dashboard should now show your license details.
If you have an activation code (common in some cloud or subscription licenses), you might activate it via the GUI or CLI:
# Example CLI command to register with FortiCare (requires internet access)
execute license update <activation_code>
Step 5: Basic Network and Security Configuration
With the license active, you can now configure the FortiGate to protect your network.
Interface Configuration:
Go to Network > Interfaces.Configure the other interfaces (port2, port3, etc.) that connect to your internal networks, the internet, and any DMZs.Set their IP addresses, subnet masks, and allowed access protocols.If you’re using VLANs, configure VLAN sub-interfaces.Consider assigning interfaces to Zones (Network > Zones) to simplify your firewall policies.
config system interface edit port2 set mode static set ip 10.10.10.1/24 set allowaccess ping https ssh set description "Internal LAN" next edit port3 set mode static set ip 203.0.113.2/29 # Example Public IP set allowaccess ping https ssh # Less access typically on external interfaces set description "External WAN" next # Example: Configure VLAN sub-interface if needed edit port2.10 set vlanid 10 set mode static set ip 10.10.20.1/24 set allowaccess ping https set description "Internal VLAN 10" next end
Firewall Policies:
Go to Policy & Objects > Firewall Policy.Create rules (policies) to control which traffic is allowed or denied between your interfaces/zones. Policies are processed from top to bottom.For each policy, define:
Source Interface/Zone and Destination Interface/ZoneSource Address(es) and Destination Address(es)Service(s) (ports/protocols)Action (Accept or Deny)
Apply Security Profiles (like Antivirus, Web Filter, Intrusion Prevention System) to policies to enable advanced threat protection.
config firewall policy edit 0 # 0 means create a new policy at the top set name "LAN_to_WAN_Outbound" set srcintf "Internal LAN" # Or the specific port, e.g., port2 set dstintf "External WAN" # Or the specific port, e.g., port3 set srcaddr "all" set dstaddr "all" set service "ALL" # Be more specific in a production environment set action accept set nat enable # Enable Network Address Translation for outbound internet access set profile-protocol-options "default" set av-profile "default" # Apply Antivirus scanning set webfilter-profile "default" # Apply Web Filtering set ips-sensor "default" # Apply Intrusion Prevention set application-list "default" # Apply Application Control set ssl-ssh-profile "certificate-inspection" # Basic SSL inspection set logtraffic all # Log all traffic matching this policy next # Example: A general deny policy (often placed at the bottom of the list) edit 0 set name "Deny_All_Implicit" set srcintf "any" set dstintf "any" set srcaddr "all" set dstaddr "all" set service "ALL" set action deny set logtraffic all next end
Routing:
Go to Network > Static Routes.
Verify the default route you configured. Add any other static routes needed to reach specific networks not directly connected to the FortiGate.
If you need dynamic routing (like OSPF or BGP), configure it under Router.
System Settings:
Configure System > Settings (e.g., hostname, time zone, operation mode).
Set up System > FortiGuard for security updates.
Configure System > NTP for accurate time synchronization.
Set up Log & Report > Log Settings to send logs to a FortiAnalyzer, FortiManager, or syslog server for monitoring.
What should you configure after the FortiGate VM is running?
You have deployed and performed the initial configuration of your FortiGate Firewall VM: you got the image, set up its resources, configured basic network access through the CLI, licensed the device, and set up essential interfaces and firewall rules. The real value of the FortiGate comes from the security features you build on top of this base.
Recommended next steps:
Configure more detailed security profiles (Antivirus, IPS, Web Filter, Application Control).
Implement SSL/SSH Inspection for encrypted traffic.
Set up VPNs for secure connectivity. Use IPsec VPN for remote access and site-to-site tunnels, and ZTNA for per-application access. Do not build on SSL VPN tunnel mode, which Fortinet is removing from FortiOS 7.6+ and 8.0.
Configure user authentication (e.g., Local users, RADIUS, LDAP).
Set up centralized logging and monitoring (e.g., with FortiAnalyzer).
Consider configuring High Availability (HA) if you need redundancy (requires two FortiGate VMs).
Keep FortiOS and FortiGuard definitions current, and stay on a supported branch (7.4 or 7.6) so you continue receiving patches.
If you would rather have this designed, deployed, and monitored for you, our managed firewall services and Fortinet solutions cover the full lifecycle, from sizing and licensing to policy tuning and 24/7 monitoring. Always refer to the official FortiGate documentation for your specific FortiOS version and deployment environment.
Updated July 15, 2026: Refreshed for the current Fortinet lineup. The G-series (built on the FortiSP5 security processor) is no longer “emerging,” it is the generation Fortinet now positions for SMBs. We have added a new section on whether to buy the F-series or the G-series in 2026, with side-by-side successor specs for the FortiGate 70G and 90G, and rebuilt the comparison table.
A firewall is not just an IT line item, it is the control point for everything that enters and leaves your network. For small and medium-sized businesses (SMBs), Fortinet’s FortiGate line remains one of the most common choices, pairing strong security with performance that punches above its price. This article compares three entry-level to mid-range models that SMBs still buy every day: the FortiGate 40F, 60F, and 80F. It also covers where these fit against Fortinet’s newer G-series, so you can decide which generation to buy in 2026.
Here is the short version. The 40F, 60F, and 80F are proven, widely deployed, and still in active production. The 40F suits very small offices, the 60F is the SMB workhorse, and the 80F covers larger branches. Their G-series successors (the 30G, 50G, 70G, and 90G) run Fortinet’s fifth-generation FortiSP5 chip and deliver roughly two to three times the threat-protection throughput. If you are buying now for a multi-year refresh, the G-series is usually the better long-term value.
For most SMBs in 2026: the FortiGate 60F is still an excellent buy and the safe workhorse choice, but if this is a fresh multi-year purchase, price out the 70G alongside it. The G-series jump in threat-protection and SSL-inspection throughput is large enough that the price gap often pays for itself before your next refresh.
Threat Protection Throughput
Threat protection throughput is the traffic a firewall can inspect with its core security services running at once (firewall, IPS, application control, and malware scanning). It is the number that matters most for real-world SMB performance, because it reflects the box working the way you will actually run it, not raw firewall speed with every security feature switched off.
What should an SMB consider before choosing a firewall?
Before comparing model numbers, size the firewall to the business. Undersize it and security features throttle your internet; oversize it and you pay for headroom you never use. These are the factors that actually drive the decision:
Number of users: How many employees, guests, and devices will connect to the network, today and in three years?
Internet speed: Your firewall should never be the bottleneck. Match its threat-protection throughput to your current and planned bandwidth.
Security services: Basic firewalling, or the full stack (IPS, antivirus, web filtering, application control, and SSL inspection)? Turning these on is what consumes throughput, which is why threat-protection numbers matter more than raw firewall speed.
VPN requirements: Do you need remote-access VPN for staff, site-to-site tunnels between offices, or both? Note that Fortinet is retiring SSL VPN tunnel mode in FortiOS, so plan new deployments around IPsec.
Network interfaces: How many wired ports do you need, and do you require SFP for fiber or PoE for access points and IP phones?
Future growth and management: Every FortiGate runs FortiOS with built-in SD-WAN, even at the entry level. Choose a model with room to grow into your next few years of users and traffic.
Tip:
Not sure which model fits? Our FortiGate sizing quiz gives you a personalized suggestion in about two minutes, based on your user count, bandwidth, and security needs.
FortiGate 40F, 60F, and 80F compared
All three are desktop, mostly fanless units built on Fortinet’s SOC4 system-on-a-chip, which offloads security and networking functions from the main CPU. They share the same FortiOS features (SD-WAN, high availability, the full FortiGuard security stack); the difference is horsepower and port density.
FortiGate 40F: The cost-effective entry point, aimed at very small offices, retail sites, and home offices. The 40F-3G4G variant adds a built-in cellular modem for WAN failover or primary connectivity.
FortiGate 60F: The most popular model in the range and the workhorse for most SMBs, with a big step up in port density over the 40F and enough headroom to run the full security stack.
FortiGate 80F: Built for larger SMBs and busier branches that need more throughput, double the concurrent sessions, and SFP fiber ports on some variants.
The table below compares the specifications that matter most for sizing. Figures are drawn from Fortinet’s official datasheets and can vary slightly by FortiOS version and sub-model.
Specification
FortiGate 40F
FortiGate 60F
FortiGate 80F
Firewall throughput
5 Gbps
10 Gbps
10 Gbps
Threat protection
600 Mbps
700 Mbps
900 Mbps
IPS throughput
1 Gbps
1.4 Gbps
1.4 Gbps
SSL inspection
310 Mbps
630 Mbps
715 Mbps
IPsec VPN
4.4 Gbps
6.5 Gbps
6.5 Gbps
Concurrent sessions
700,000
700,000
1,500,000
New sessions/sec
35,000
35,000
45,000
GE RJ45 ports
5
10
8 to 10
GE SFP slots
0
0
2 (some variants)
Processor
FortiASIC SOC4
FortiASIC SOC4
FortiASIC SOC4
Typical user count
Under 20
20 to 75
75 to 150+
Which FortiGate F-series model is right for your business?
FortiGate 40F: Best for very small offices (roughly under 20 users) with standard security needs and moderate internet speeds. The 40F-3G4G is the pick for sites that need cellular failover.
FortiGate 60F: The sweet spot for most SMBs (roughly 20 to 75 users). It balances performance, port count, and price, and handles the full security stack on a fast connection without falling over.
FortiGate 80F: For larger SMBs (roughly 75 to 150+ users), busier branches, or gigabit connections. Its higher session capacity and optional SFP fiber ports give it real headroom.
Should you buy the F-series or the new G-series in 2026?
If this is a fresh, multi-year purchase, price out the G-series first. Fortinet’s G-series (the 30G, 50G, 70G, and 90G) is now its current SMB generation, built on the fifth-generation FortiSP5 security processor that accelerates firewall, VPN, and threat inspection on a single chip. The practical result is roughly two to three times the threat-protection throughput of the F-series, and SSL inspection that no longer collapses your usable bandwidth when you turn it on. The F-series is not going away and remains fully supported, so there is no urgency to rip and replace working hardware, but for new buys the math usually favors G.
The successor mapping is straightforward: the 40F lines up with the 30G and 50G, the 60F is succeeded by the FortiGate 70G, and the 80F steps up to the FortiGate 90G. Here is how the two most common upgrade paths compare on the numbers that matter:
Metric
60F
70G (60F successor)
80F
90G (80F successor)
Threat protection
700 Mbps
1.3 Gbps
900 Mbps
2.2 Gbps
IPS throughput
1.4 Gbps
2 Gbps
1.4 Gbps
4.5 Gbps
SSL inspection
630 Mbps
1.4 Gbps
715 Mbps
Higher
IPsec VPN
6.5 Gbps
7.1 Gbps
6.5 Gbps
Up to 25 Gbps
Concurrent sessions
700,000
1.4 million
1.5 million
3 million
New sessions/sec
35,000
100,000
45,000
Higher
Processor
SOC4
FortiSP5
SOC4
FortiSP5
The threat-protection and SSL-inspection lines are the ones to watch. As a Fortinet Advanced Partner deploying these boxes across GTA businesses, the pattern we see most often is a client who bought a 60F, turned on full SSL inspection a year later for compliance, and discovered the box was working harder than expected on a gigabit link. The 70G’s 1.4 Gbps of SSL inspection (more than double the 60F) is exactly the headroom that scenario needs. That is the single most common reason we now recommend pricing the G-series into any new SMB firewall purchase.
Buy for the security stack you will run, not the one you run today. Compliance requirements, remote work, and cloud apps all push SMBs toward full SSL inspection within a year or two. Size the firewall on its threat-protection and SSL-inspection numbers with those features on, and the G-series headroom stops looking like a premium and starts looking like insurance.
What do FortiGate licensing and subscriptions actually cost?
The hardware is only part of the total cost of ownership. FortiGate security features (antivirus, IPS, web filtering, antispam, and cloud sandboxing) are delivered through FortiGuard subscriptions, usually sold as a bundle such as the Unified Threat Protection (UTP) package. FortiCare support covers hardware replacement, firmware updates, and technical assistance. Both are recurring costs, and they apply to F-series and G-series alike, so factor a multi-year subscription into any model comparison rather than pricing the appliance alone.
Making the right choice
Choosing a FortiGate comes down to sizing honestly for the next few years, then deciding between the proven F-series and the higher-headroom G-series:
Very small or budget-conscious offices: the FortiGate 40F is a solid starting point, or the 30G/50G if you want the newer platform.
Most SMBs: the FortiGate 60F remains the reliable choice, with the 70G as the future-proof upgrade if the budget allows.
Larger SMBs and busy branches: the FortiGate 80F delivers the headroom, and the 90G roughly doubles it again if you are buying for growth.
Choosing the right FortiGate firewall is crucial for maintaining a secure and efficient network. An undersized unit can become a bottleneck, leading to slow performance and a frustrating user experience. Conversely, an oversized unit means you’ve overspent on hardware you don’t fully utilize. At BALANCED+, we believe in finding that perfect equilibrium. This guide will walk you through the essential considerations for properly sizing your FortiGate to ensure optimal performance and robust security.
Why Proper Sizing Matters
Before diving into the “how,” let’s understand the “why.” A correctly sized FortiGate ensures:
Optimal Security: The device can handle the processing demands of all necessary security services (like Intrusion Prevention, Antivirus, Application Control, and SSL Inspection) without bogging down.
Peak Performance: Your network users experience fast and reliable connectivity, without the firewall becoming a chokepoint.
Cost-Effectiveness: You invest in a solution that meets your current and near-future needs without overspending on unnecessary capacity.
Future Scalability: A well-sized unit, with some room for growth, allows for easier adaptation as your business and network demands evolve.
Key Factors to Consider When Sizing Your FortiGate
Sizing a FortiGate isn’t just about matching your internet speed. It’s a multifaceted process. Here are the critical metrics and features to evaluate:
1. Throughput More Than Just a Single Number:
FortiGate datasheets list various throughput figures. It’s vital to understand what each represents:
Firewall Throughput (UDP/TCP): This is the raw packet processing capability of the firewall, typically measured with User Datagram Protocol (UDP) traffic, which has less overhead than Transmission Control Protocol (TCP). While a useful baseline, it doesn’t reflect real-world performance with security services enabled.
Next-Generation Firewall (NGFW) Throughput: This metric reflects performance with key security services like Intrusion Prevention System (IPS) and Application Control enabled. This is often a more realistic number to consider for typical deployments.
Threat Protection Throughput: This is arguably the most critical throughput number for most businesses. It indicates the performance when multiple advanced security services (like IPS, Antivirus, Application Control, and often sandboxing) are active simultaneously. This is the figure you should most closely align with your actual internet bandwidth and internal traffic inspection needs.
SSL/TLS Inspection Throughput: If you plan to decrypt and inspect encrypted traffic (which is increasingly important for security), this figure is paramount. SSL/TLS inspection is resource-intensive, and the dedicated throughput for it will be significantly lower than other throughput metrics.
IPSec VPN Throughput: If you rely heavily on site-to-site or remote access VPNs, ensure the FortiGate model can handle your encrypted VPN traffic demands.
BALANCED+ Tip: Always focus on the “Threat Protection Throughput” and “SSL/TLS Inspection Throughput” (if applicable) as your primary guides, rather than just the basic firewall throughput.
2. Concurrent Sessions:
This refers to the total number of active connections passing through the firewall at any given moment. Every time a user accesses a website, sends an email, or uses a network application, one or more sessions are created.
Consider: The number of users, the types of applications they use (some applications, like peer-to-peer, open many sessions), and the number of IoT or always-on devices on your network.
BALANCED+ Tip: It’s wise to choose a model with a concurrent session capacity that comfortably exceeds your current peak usage to accommodate growth and unexpected spikes.
3. New Sessions Per Second (CPS):
This metric indicates how quickly the FortiGate can establish new connections. A low CPS rate can lead to delays in opening new web pages or starting new applications, especially in environments with many users or services initiating connections frequently.
Consider: High-traffic environments, web servers, or applications that rapidly open and close connections.
BALANCED+ Tip: Don’t underestimate this metric, especially if you have a dynamic environment with many users initiating new tasks simultaneously.
4. Interface Requirements:
Consider the number and types of network interfaces you need:
Ports: How many LAN, WAN, DMZ, and other segments do you need to connect?
Speed: Do you require 1Gbps, 10Gbps, or even faster ports?
Type: Do you need copper (RJ45) or fiber (SFP/SFP+) interfaces?
Power over Ethernet (PoE): Will you be powering devices like access points or IP phones directly from the firewall?
5. VPN Requirements:
If you use Virtual Private Networks (VPNs):
Site-to-Site Tunnels: How many persistent VPN connections to other offices or cloud environments do you need?
Remote Access Users: How many concurrent remote users will connect via SSL VPN or IPsec VPN?
BALANCED+ Tip: Ensure the chosen model has sufficient VPN throughput and tunnel capacity for your needs.
6. Other Feature Impacts:
Certain features can significantly impact resource utilization:
SD-WAN: If you plan to leverage FortiGate’s robust SD-WAN capabilities, factor in the overhead for link monitoring and traffic steering.
Logging and Reporting: Extensive logging requires storage and processing power. If you’re sending logs to a FortiAnalyzer or SIEM, this is less of a burden on the FortiGate itself.
High Availability (HA): If you require a redundant setup, you’ll typically need two identical FortiGate units.
7. Future Growth:
Always plan for the future. Consider:
User Growth: Will your number of employees or network users increase?
Bandwidth Increases: Do you anticipate upgrading your internet connection?
New Applications/Services: Will you be deploying new technologies that increase network load?
BALANCED+ Recommendation: Aim to size your FortiGate to handle your current needs plus 20-30% capacity for future growth over the next 3-5 years.
Common Sizing Pitfalls to Avoid
Focusing Solely on Firewall Throughput: Ignoring NGFW, Threat Protection, and SSL Inspection throughput.
Underestimating Concurrent Sessions: Leading to dropped connections and poor user experience.
Forgetting SSL Inspection Impact: This is a major performance hit if not accounted for.
Not Planning for Peak Loads: Sizing only for average use can cause issues during busy periods.
Ignoring Future Growth: Leading to a premature and costly upgrade.
Not Understanding Your Traffic: Perform a network assessment to understand your actual usage patterns before making a decision.
Optimizing Performance Beyond Sizing
Once you have your FortiGate, remember that configuration plays a vital role in performance:
Firmware Updates: Keep your FortiOS firmware up-to-date for the latest performance improvements and security patches.
Policy Optimization: Streamline firewall policies and remove unused or redundant rules.
Selective SSL Inspection: Only inspect traffic that needs it. Create exemptions for trusted, high-volume traffic where appropriate.
Resource Monitoring: Regularly monitor CPU, memory, and session load to identify potential bottlenecks.
Hardware Session Offloading: Ensure features like hardware acceleration are enabled where appropriate.
Get a Free Expert Sizing Assessment
Properly sizing a FortiGate firewall is a critical step in building a secure and high-performing network. It requires a careful analysis of your current environment, security needs, and future growth plans.
Ready to find the perfect FortiGate for your organization? Let the experts at BALANCED+ help! We offer a free, no-obligation sizing assessment. Fill out our form, and one of our certified engineers will help you determine the ideal FortiGate model to meet your specific requirements.
Choose the Right FortiGate From The Start
Take our quick quiz to get a personalized suggestion for your business.